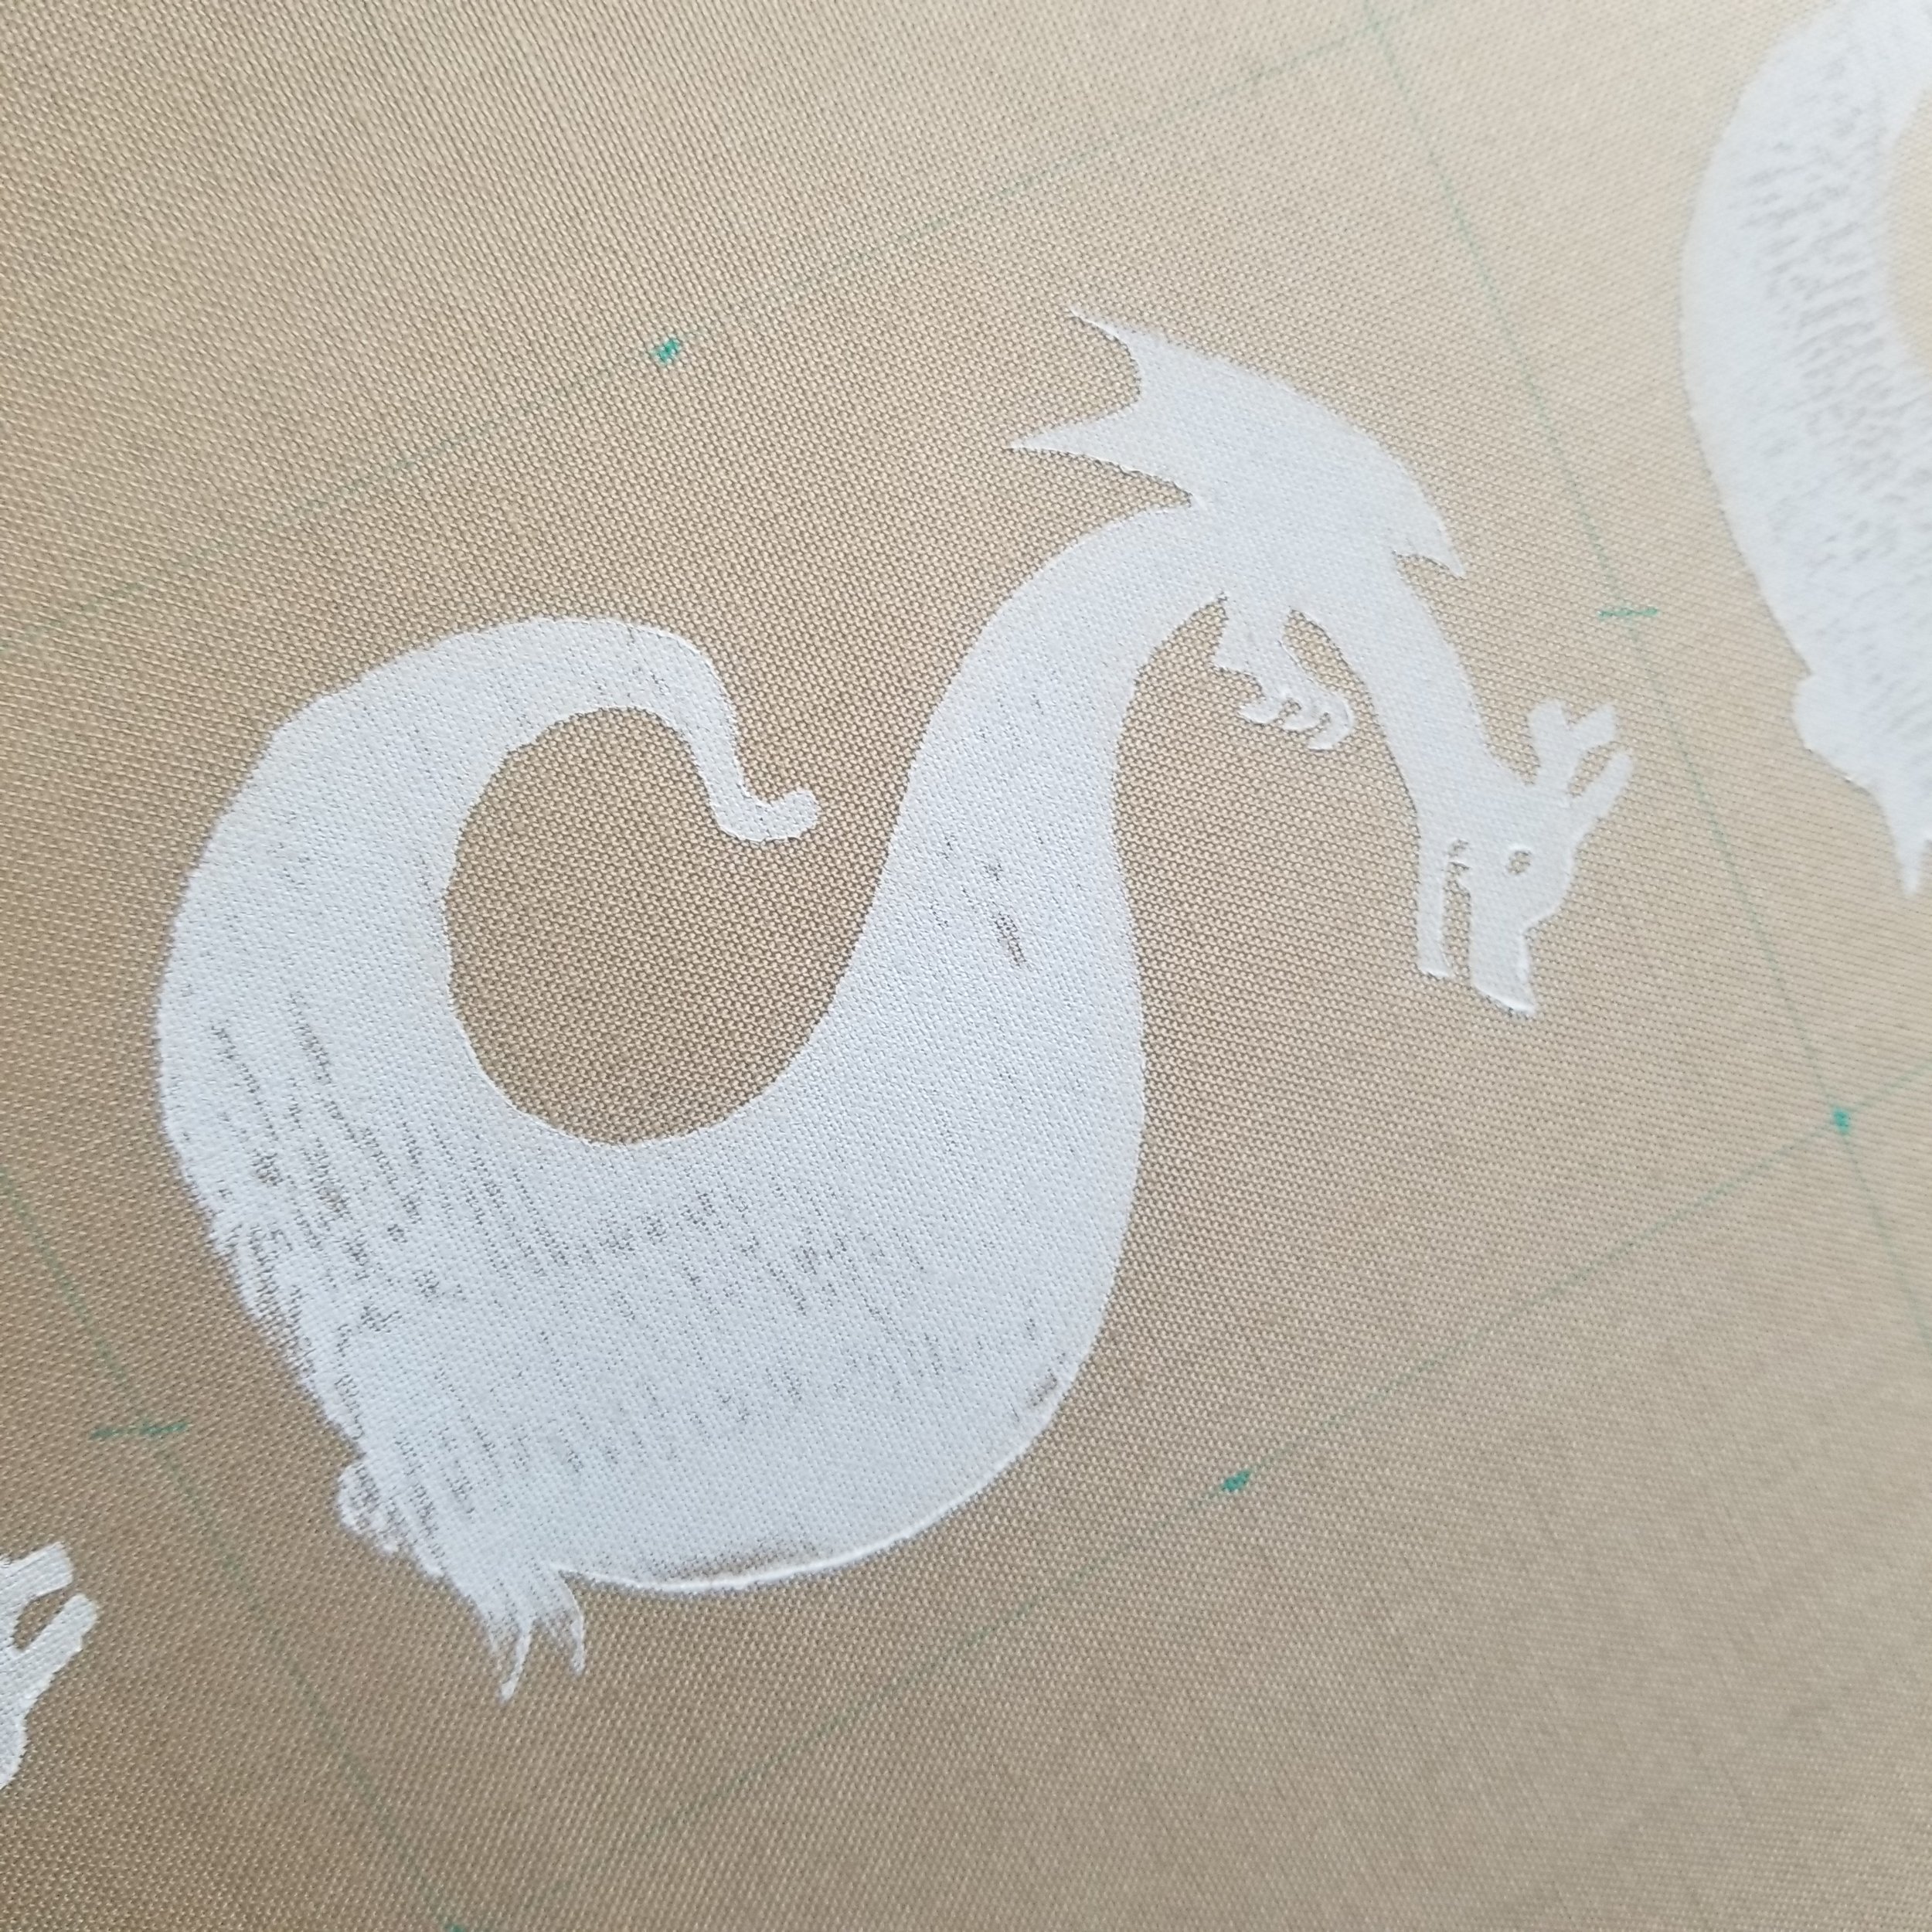
D for Dragon

SCAN QR Code to bring up Digital Web Page.
Enjoy a LINKED Costume Index and Enlarge high-resolution images, for detailed viewing.
Tohru Fabrication
“A female dragon of the Chaos faction who comes from another world called the dragon realm and is capable of using magic to perform such tasks as "perception-blocking" (which causes people to simply overlook her), repairing damage she may have caused, or transforming between a dragon and a human.” - Miss. Kobayashi Wiki
I draw out EVERY cosplay. What started as a way to just air out my watercolors, has turned into the beginning stages of engineering my next creation. This allows me to see each and every element. Just how much I will need to fabricate and the order that things will need to be done. It is also a lot of fun!
With my drawing(s) laid out in front of me, it was time to do some “research”. After re-re-re-watching Season 1, 2 and all of the Mini-Dragon a CHAOS DRAGON could take, I was ready to decide on Tohur’s attire. Initially, I thought there was not going to be much to worry about, however, after reading the manga and viewing the anime - there were small but noticeable differences between each of her reference images.
The above images are from different OFFICIAL sources. You can easily see the differences - black socks on the left and white socks in the center. The color of her attire in the manga is black and red, whereas in the anime, it is indigo and salmon. Her tail in the anime is green and light green, and in the manga, green and a light yellow.
Let the true chaos commence. (It’s puny because she is a chaos dragon!)
Where to Start?
Starting from the bottom and working our way towards the surface.
First, on our fabrication list are my white petticoats. Having made a petticoat before, I was looking forward to a more refined execution. My fabric/material of choice was a heavy weight, high grade, white %100 cotton. I cut a very simple A-Line circle skirt from a pattern that I mocked up years ago. After adjusting the hem length, I ran ALL panels through my serger to close up the loose edges. This would stop the fabric from fraying with the over handled pieces.


PETTICOATS
Side seams were pressed and sewn down to make for a cleaner wear and to make ironing later easier!
Twill tape was used for the waist band and I purchased a lovely eyelet ruffle for the hems that would hopefully shield viewers from my unmentionables!
In the above images, you can see the weight of the fabric is noticeable, and the lack of silhouette that my underskirts were having on the eye. I used nearly 50 yards of 1” horse hair braid! We all know how pokey and unappealing horsehair braid can look, so I chose to encase it in my own double-fold bias tape.
PERFECT! The skirts not only retained their shape but also do not hug the body around my legs.


CAMISOLE/SHIFT
You Can Watch my Shift (TWITCH) Live Stream: (1-18-2023) HERE
It was not until after I had finished my corset, that I needed to find a way to keep my body ‘funk’ off of my corset. I knew that I was not the only female to have run into this problem, so after creating my first underbust corset, I was going to create my first camisole. A thin single under garment was going to solve more than just the OBVIOUS problem at hand. It is always nice when you see your project’s first BLESSED-SEAMS!
(1) Solve - Direct skin contact to corset
(2) Solve - ‘Arm pit pads’ being visible from the inside of my white blouse (armpit pads can be applied to large ‘arm pit’ spaces on the shift)
(3) Solve - Another layer to create more ‘poof’ inside my white blouse
(4) Solve - Covers my bra/breast from being exposed with just the underbust corset on
(5) Solve - Unwanted harness rubbing on my shoulders
It was a simple pattern I used my Dittoform to mock up a pattern with. I made sure it would not show from under my petticoats, but was still be long enough to be pulled down if it starts ridding up. With such a lightweight cotton, it is almost see through when looked at from the correct angle. I wanted there to be a faint pattern, something that was simplistic and did not show from under the white blouse. All seams have been serged, and hems have been double rolled by hand and machine sewn.


UNDERBUST CORSET
After using my Dittoform (identical body-double dress form) to mock up my base pattern, I took liberties to add some side-boob lift (extra height in all the right places) as well as extending my original pattern’s back pieces to accommodate a harness and backplate. Keeping my fabric choices available in mind, I wanted it to be a little extra. The game plan was to create a reversible spiral steel boning corset with the pretty fabric on the outside, and the foundation cleanly executed on the inside. Everything was going smoothly with the fabric fused together, pattern pieces cut, and boning channels marked. [100% Cotton Fabric (KONA Classic) + Heat ‘n Bond + White Denim Fabric] I Re-Measured my seam allowances/Cut Fabric(s). It was now time to created my ‘pattern’ for the fabric.
NOPE - That Did Not Work
You know when you have that GREAT idea, only for it to not hit as hard as you had wanted in the end? That is the story of my first attempt at creating my own ‘patterned’ fabrics. Stepping back into my artist background - let’s just say I was EXCITED to carve out my own block stamp and print my alternating pattern onto each measured pattern piece.
However, when I stamped my material and thought things were going well, (please keep in mind; I am live on stream at this point to…) the stamps were not printing as ‘cleanly as I would have liked. The structure of the fabric could not absorb the ink and it was not ‘Maid-Clean’. It had worked perfectly for previous cosplay fabrics, but did not look right for this one. A maid would have clean crisp marks. With a heavy sigh, I cleaned up my mess and was back to the drawing board.


Our Lucky Cricut!
During this same week Mama-Dis had hip surgery. The game plan was to spend a day with her, assisting her with things around the house. I also remember that Mama-Dis had a Cricut and a Brother. I briefly discussed with her my desired plans and she was thrilled to be of assistance.
Step One: Bring my own design! Using GIMP software, I created a .png file of my desired design in black and in white. I saved my images in various file types, just to be safe. I already had the white iron-on vinyl from a previous project.
The process was super simple. There was NO way I could mess things up. The Software takes you step-by-step, making sure you check and approve/push glowing or flashing buttons.
It didn’t matter what image I used, as the software was able to scan the perimeter and mark my cut lines with ease. This was so much EASIER than carving out my Speedball black, making a wood backing, inking, stamping, and then waiting for things to dry. My hands and work space also stayed clean. I can definitely see why this has become as popular as it has. I have to hand it to Mama-Dis and her crafting tech. She uses it predominantly for her card making and scrapbooking needs. Thank you Mama-Dis for letting me borrow you Cricut for the afternoon.
AFTER, re-making EACH corset pattern piece, I was right back where I started.
Weeding my Dragons was painless and I was able to cut each dragon free to play with their pattern orientation. I used a water soluble marker to make notations for each decal to line up with. Little heat here and there! Wam-Bam there’s some dragons Mama!


It is refreshing when things take a turn and go as planned. That is what I was thinking when it came to this pattern lining up almost too perfectly. I tried to measure everything out! I’ll take the win after all of this trial and error! Denim was a tricky/thick material to work with. I had to make sure to iron my seams and sew them flat. The last thing I wanted was large seams digging into my sides or busting open. The whole goal of the underbust corset was not for shapewear but for support wear. I needed some metal and extra hip support to assist with supporting all the layers of skirts, and tail the belting.


Time for the Corset Construction
You Can Watch my Underbust Corset Construction (TWITCH) Live Stream: (1-9-2022) HERE
You Can Watch my Underbust Corset Construction (TWITCH) Live Stream: (1-23-2023) HERE
After a quick shopping visit at the Online Corset Making Supplies, I was equiped with a continuous spool of spiral steel boning in 1/2 inch and 1/4 inch. The 1/2 inch boning would be used for the main channels, whereas the 1/4 inch boning would be used for the closure. I used the same beige cotton-fabric for my double fold bias tape. I used twill tape at the waist for added strength and support. I even piped/reinforcement between my grommets and seam. My grommets are 1/2 inch double sided grommets from the Buckle Guy online. I love their product and can even use them with my Gold Star Tools Hand Press!
I created my own double fold bias tape to sew-in as my boning channels. I prior marked and darted in a Twill tape waist line, and used some of my heavy duty wood working pliers to crimp the end caps. It took longer to cap my steel boning then it did to press in the grommets.


I ended up adding my double sided grommets prior to closing up my edges. I wanted to make sure that there was no material that needed to be trimmed away. My hand press made quick work of these lace closers. I also have friends cheering me on in chat as we streamed the final fabrication steps with my community. I ended up using long white boot laces in a double tie - both bows coming together at the waist.


Corset Flossing
Another first for Disfusional: Corset Flossing with 18 channels of spiral steel boning. I used a 3-color gradation (B5200 - White, 3865 - Off White, 3866 - Light Beige) in a V-Pattern. Huge thank you to Lina Piprek on YouTube for the video assistance. I was able to learn about a bunch of flossing patterns to decide what would look/work best for my corset,
Even with the the repetitive process of dressing my mannequin; I noticed that the boning channels were sliding from top to bottom ever so slightly. I did not want one of the caped ends to push against the bias tape hem - Flossing was my answer. It was very relaxing, sewing between the boning casing and the steel, hiding my thread and creating low-profile knots. I cannot wait to add this element to future corsets.


MAID APRON
It already started jumping out of order in the fabrication process.
After, Tohru’s petticoat construction, I wanted to use all the same materials too. There are NO visible edges on this piece and it is simply beautiful and it’s just an apron. First, mocking up my pattern, I cut my cotton fabric and serged my edges (they just look so clean all thread-locked and tidy.) Before adding any of my hand made double-folded bias tape, I straight stitched on my eyelet trim.
The gathered waist makes for a lovely form fit, and three long-pockets will safely store my gloves when I am snacking on convention soft pretzels!


WINGS + HARNESS
You Can Watch my Dragon Wing (TWITCH) Live Stream: (12-7-2022) HERE
You Can Watch my Dragon Wing (TWITCH) Live Stream: (2-6-2023) HERE
Wings
Some projects simply start with a rejected, over used, stained, cutting board. But truly, what are you supposed to do with the chunk of plastic when it is no longer safe cutting food upon? SECOND LIFE! Save it for art purposes - Duh.
I took the cutting board to the workshop and scroll sawed my backplate into shape. Using a palm sander I realized how much of a pain it is to sand plastic - it gums up my tools. Coarser grit was needed for this project. I used a heat gun to shape a slight S-curve into the plastic. This would give my shoulder blades a little more room. I knew that I would be using a cutting board for my backplate even prior to having my wing size determined. I was very indecisive, and I was lucky to have a few dozen friends to ask. Air-Five to The Disfusional Studio Community for choosing a 2.5” enlargement.
I used a bunch of left over foam scraps, and glued pieces together to be able to fit my wing pattern. There would be so much work going into these, they did not need to be one solid piece of foam, and it seemed almost wasteful to go and get new material. How else does one get rid of ‘scraps’? My wing-support tubing and couplers were made from PEX tubing. It is even lighter in weight than PVC. However, I highly recommend adding more support, in the case things get heavy. Proactive instead of reactive, I always say. I created channels and heat shaped the plastic, using hot glue to fill in the gaps and make sure the pipes did not move in their placements.


Foam clay was used to fill in large gaps and holes, and I used the clay to sculp a more rounded top prior to sanding my wings down. The initial box-cutter foam removal process was followed up with some Dremel work. The wings needed to be smooth and light, and the lighter the better. After my initial sanding, I still noticed some unwanted seams and holes in the foam I was not able to get with my sanding materials or tools. After carefully applying Kwik Seal here and there…and literally everywhere, I was able to wet sand with 400 grit to smooth things out. I even chose to use FlexBond for my primer, due to the same wet sanding properties! Great for Worbla, flexible enough for EVA foam - that and I have a giant bucket of this stuff.


Rust-oleum made quick work of my base coat. I just needed something to cover my wings evenly and quickly. What I did not need was mother nature to dump buckets of snow on me as I was trying to get this portion completed. I set up a space heater in my garage and tried my best to keep the temperature workable. I ended up coating everything with acrylic paint, and I had left over black and gray paint, matching the hues needed for the anime. After blocking out my light gray and black, something still looked like it was missing. I have tried to make sure that EVERYTHING is cannon. Depicting shadows and lines from the anime as best as possible. This was a moment when I needed too look back at my reference material.
This would be a text book definition of Cel Shading. I added in a mid-tone, and you will notice the dark gray shadows in the wing’s sections. This was exactly what this needed. I selected a Poly Urethane spay for a glossy clear protective coat as I imagined that I would be bumping them against doors and walls, and just trying to make the tips as sturdy as possible.


Harness
Keeping with the 100% Cotton material used for the project. Why not find some beige cotton belting in two needed sizes? I was able to use my industrial sewing skills once more. Instead of sewing rachet strap belting for car haulers, I was sewing cotton belting for Dragon Wings. I think this is an upgrade, if you ask me.
More Buckle Guy D-Rings were used for a low-profile chest closure, and a quick-release buckle for a below the bust closer/support. I tried to find a white buckle, however, the quality of the white buckle was not reliable. I had to return and use known quality products.


Various Chicago Binding-Screws were used to not only to secure my brackets to the backplate, but also as locking pins to hold the wings in place. The locking pins prevent my wings from spinning or popping apart, leaving me with almost full range of motion. I have made it so the wings can be attached even with the rest of the cosplay already on. I am very proud of the alterations I have made to the white shirt to keep all this handware hidden!


DRESS SHIRT
You Can Watch my White Blouse (TWITCH) Live Stream: HERE
Back on track with more white fabric. It was at this point that I realized I wanted to work with something other than the soul-sucking shade of WHITE.
However, this was my FIRST time drafting and creating my own button-up shirt. Even with that being said, I have worn my fair share of button up/down/all around shirts in my Woodshop teaching days. From the start, I wanted to hide as many raw edges as possible, and I also wanted to topstich and press everything.
After cutting my pattern pieces, I had to hold off from serging everything. This was as much of a sewing project as it was also an engineering project. There would be some seams I would serge as one, and others that I would refrain from due to the bias-tape encasement. with the back yoke, This is the upper back portion of the shirt. This is the only portion of the shirt that is lined for shoulder blade reinforcement purposes.
The upper back portion of the shirt is the back yoke, and I pinned and straight stitched my pattern pieces and after sewing at the shoulders, then rolled my shirt up into itself. This gave me the ability to sew the internal seam of the yoke. At this time I also serged all three edges of fabric together. This would create a lower profile and thickness, and give an overall cleaner appearance against my back. This is important with such a see through fabric and color. After serging, I turned my fabric out through one of the soon to be arm holes. Creating the rest of the shirt was pretty straight forward. Dart the breasts, gather the shoulders, top stitch here and there, etc.


Insert the START of my Scalloped-Edge-Box-Pleating-HELL!!
… that is until you get to the sleeves. Remember me talking about my sanity….
It was time to start crafting my scalloped edges. After studying all of Tohru’s references (cannon and fan art) I decided to painstakingly make all her ruffles look like dragon scales.
I used 6 full yards of fabric to create ALL of the Scalloped-Edge-Box-Pleated-Ruffle-Hell-Hem! The process was supposed to be quick and easy…I remember telling myself, and it was only after the first week of creating these that I realized the mistake I had made. This was not going to be quick.
Here is the process I used to create ALL my scallops of various sizes:
Created a template that was the ‘ideal’ size for the scalloped trim.
Prep your fabric: cut a piece of fabric that was as long as possible. Just like creating Bias tape, I connected all of these pieces together so that I would be working with one super long piece of fabric. I folded this in half and pinned/ironed my material.
Start tracing my pattern upon all of the trim.
Carefully sew on the round. This was a process of sewing 4 stitches at at time and lifting up my presser foot with my needle in the down (holding fabric) position to rotate the material and continue the stitching process.
Used Pinking Shears to carefully cut all the negative space away.
Use small sharp scissors to snip in towards the scallop points.
After cutting the fabric on the fold I turned my scalloped edges right-side out. Pressing my hem.
Now it is time to find the center of every scalloped edge and create the box pleats, transforming the scallops into aesthetically pleasing dragon scales!!
… I repeated this process for a total of three weeks working time. I wanted to make sure everything was clean and precise. After all you did not want any flat sides on your scales.


Let’s Cont. to Button-Up
When it came down to finishing the button-up shirt, I started with the collar. All of my raw edges were quick to be enclosed in the lining for my collar. I was able to turn and press the interface into the color as well - assisting with it’s rigid shape. I chose to stitch-in-the-ditch as a means to conceal some of my topstitching.
My sleeves were gathered at the shoulder to create a puffy effect. All of my raw and serged edges have been encased in more handmade double-sided-bias-tape. This is a technique that I will be using for many projects from here on out. It was soft on my arm pit and will create a seam that will last. After all, no one likes pit-stains and I will be using arm pit pads to assist with keeping things fresh.
There is so much topstitching on this dress shirt - I think that I shaved a couple years off my life…


DRAGON TAIL
You Can Watch my Dragon Tail (TWITCH) Live Stream: HERE
Time to craft another FIRST. I used human armature dummy as a model to sculpt a mini tail from paper and masking tape. I originally wanted a tail that swooped off to the side. Making it easy to see when taking photos from the front. My sculpture was wrapped in masking tape before I drew registration marks. The marks were to be used when I cut the outer later of masking tape free from the sculpture. Using these pieces as my mini-pattern.
My mini-pattern-mock-up was then transferred to a 2mm EVA craft foam. Measure twice, cut once. The foam also gave me an idea of any heat-forming complications we might run into later on down the line.
Using Tohru’s height and Tohru’s Tail length; I was forced to do some math. I used my own height and Tohru’s height to figure out that I would have a tail length of roughly 55 inches long. Meaning: All pattern pieces were hand enlarged by eight times.
I loved dipping back into my traditional art roots. I used a grid transfer process to enlarge my pattern pieces and get them ready for 30mm High Density EVA Foam.


This is when I realized everything I just did… was not going to work…
After taking a step back and getting a restful night’s sleep, I realized that the tail I was originally going to make was going to cause two ‘issues’.
ONE: It was going to hit the back of my heels EVERY time I take a step.
TWO: It would look ridiculous when I tried to imitate Tohru’s cool dance moves.
Meaning, all my tail work up until this point was for naught.
After taking a trip to the recycling bin and clearing my work space, I started the process all over again. I created a paper and masking tape sculpture of the NEW and IDEAL shape, tested my mini-pattern with 2mm EVA foam, and used the same grid enlargement technique I had used for mural paintings. I ordered three jump rolls of 30mm High Density EVA Foam. I even got to put my friend’s prototype x-acto blade tool to the test. This was one of his ‘test' units’ from alpha testing - different than the ones he is selling now! New ones are BETTER and have metal bits! (Shout out to Rocket Props!!)
This was the FIRST time I have used SKS foam, and was a bit skeptical at first but though ‘EVERYONE’ uses this stuff, so must be good right - RIGHT!
So smooth and lovely. My knife loved slicing into this stuff.
There were multiple pieces that needed to be heated up with a heat-gun to assist with shaping. I opted for the thickest material to make sure it would hold its needed shape. I used Barge contact cement to bond all my pieces together. Masking tape was used to assist with holding things together for 24 hours while it finished setting up. After putting everything together, I also decided to cut my tail into pieces to add internal support structures into THREE different portions of the tail. I wanted to avoid any potential for a cave in or collapse. There is also a small circle-hole at the base/top to help push trapped air out.


Now to cover my masterpiece with NON-STRETCH fabric as tightly as possible.
I wrapped my foam-built tail in cling wrap and a single layer of cheap masking tape. Again, I made registration marks on the tail. Using scissors, I started at the ‘air-hole’ and freed my tail from its tape prison. In doing so, I created my pattern pieces.
I had a lot of extra green fabric, and chose to make my mock-up on the exact same fabric I would be created my finished product with. I did not want ANY surprises at this point. There were a lot of marks and letters and sewing with red thread for this part. I needed to select a thread that would be easy to see and seam rip out later.
After some small alteration, I ripped out all my stitches and cut TWO of every pattern piece to account for the lining, as I wanted to make sure you could not see the foam material below. They yellow cotton was a bit see through and I didn’t want that. Below you can see the lining snug against the tail base. I covered the whole thing with the correct right-side-out cover. Before hand sewing the base up.
Time to add belt attachments.
Why did I say NO METAL?!
This was a challenge. Only plastic and fabric was my goal. With some super thick white belting and a plastic belt clip, I used ultra thick interfacing and more cotton fabric to create THREE belt loops pulling tension from TWO different locations. Two long pieces pull tension and hold the tail from the top, where one medium size pieces pulls tension up from the dragon’s ‘belly’.
I chose to carefully hand stitch the dragon tail cover closed. I wanted a super clean finish and also to make sure that nothing shifted. I hand stitched my lining together than fitted my top layer using pins to tack everything into place.


Dragon Stomach Scales
What I thought was going to be a small undertaking, turned into an epic adventure of mass scale production! Fabricating these scales should assist with making it look more dragon-like. This would give me a chance for color correction and to match closer to my anime/manga reference images.
With the tail already being covered/lined and hand sewn into place, I would need to create a pattern without altering what was already assembled. Using a wide blue painters-tape, due to it’s no-so-sticky nature, I knew it would not leave residue behind. I covered the yellow-stomach area with blue painters tape, and using a sharpie and a ruler, I measured and marked off my stomach scales before removing and cutting my newly created puzzle pieces. Once free from the tail it was obvious to see how uneven they were. I refined my pattern pieces on scrap paper. Pinning and making sure everything fits up against the first.
Flex-Foam interfacing was what I selected to stuff my pillow like scales. Because Flex-Foam is flexible, I could sew around the perimeter of each long scale and leave a small opening to stuff and hand sew later. I used an invisible ladder stitch to lock everything in. I really love how pillowy they look and feel. Initially I was going to hand sew their perimeter, locking everything into place. However, after hand sewing one scale I KNEW that was not going to work. When the stitches where pulled tight; It became too low profile and lost it’s pillowy esthetic. I applied an ample amount of glue to my desired area(s) and applied and pinned each scale individually. I made sure to pin into the bottom layer of cotton fabric under the seams.
After 12+ hours I carefully removed my pins and the stomach scales where finished. Just with the stomach scale alteration alone it looked more dragon like.


Scale Fabrication
I patterned out FOUR different dragon scales - 1.5 inches, 2 inches, 2.5 inches, and 3 inches. I used the same green 100% cotton fabric I used for ‘skinning’ the tail. I proceeded to dye this along with the tote bag fabric. I was not trying to drastically change the color, but rather create a hue that was just a little darker of a dye-plot. However, I did not realize in the moment it would mean I’d have to iron yards of green fabric later. I was able to use a dark green fabric I was aging nicely on a shelf for this specific moment in time. In true cartoon or anime fashion I wanted to limit the amount of black lines by using Cel Shading as my method of execution.
Full Scale Pre-Process:
1. Trace scales onto the darker green fabric. It was easier to see the white water-solution pencil.
2. Cut out each scale. This was a rough cut before I placed each scale on my brighter green top fabric.
3. I pinned all the bottoms to their corresponding tops.
4. BEFORE cutting/trimming with pinking scissors, sew around the perimeter of each scale, keeping the top of each scale open.
5. Turn every scale right-side-out and use a Bone-Folding tool to make sure the scales keep their rounded edge.
6. Roll in top hem line to match and top stich closed.
It took hours to puzzle my scales together. Making sure I used the smaller scales appropriately and that there were no empty holes, etc. After moving each and every scale millimeters before pinning into place. I prepped many scales before attaching them to their tail base.


BLUE OVERDRESS
You Can Watch my Blue Overdress (TWITCH) Live Stream: HERE
Originally, I cut out one more skirt panel than needed. I just did not want to take an chances with the fit over my dragon tail. Pattern pieces were cut and then serged with the same color Gutermann serger thread. I use a two-needle stitch for sealing up the pattern edges., and I also made a bunch of double-fold-bias-tape in the blue (which I NEVER ended up needing - oops)
The lining was the layer of the cosplay that I attached the 1 inch horsehair braid to. This would allow me to hide my stitches by rolling the hem over.
The bodice pattern was mocked up on my dress form to fit perfectly over the white button up.


I was against using any metal for this build, while trying to make this as light weight as possible (please disregard all of the weight from all the yards of fabric it took to construct). That meant that buttons are going to be my go-to attachment. Anyone else ever fear making button holes?
Tohru’s shoulders required a different size and length of scalloped edging. There was a tapper to the front and back, and they had to be long enough to out stretch over my shoulder(s). A thick interfacing was used to help keep the shape and form of the straps, and buttons were used to attach the shoulder straps at the waist. When watching Miss. Kobayashi’s Dragon Maid anime I noticed that they need to attach more at her sides than her back. These straps had to be attached prior to my skirts being sew to the bodice portion. I assumed that there would be a little bit of stress on these straps. I also did not want to be able to see my button stitches from the front side. Nothing a color-matching button cannot take care of!


… HELL continues to claim my Scalloped-Soul
This was where my soul left my body!
This is the point that if I had any sanity left it my - I cast it off to the Scalloped-Edged-Overlords!
The metal container is a steel clothes washing container; just to give you an idea of size and how much hem I had to make for the blue over-dress. To prove my point - there is less than a foot of scalloped trim left over. Talk about one hungry dragon!


Nom Nom…
The last step for my Blue-Maid-Overdress was to FINALLY attach the long hem I had spent hours, days, weeks making!
After pressing the entire hem with my iron, I measured and stitched into the hem. The top layer was then sewn to the dress lining, hiding the stitches underneath the pleated scallops.
TA-DA!


NECK TIE + WAIST BOW
It is not often that you get to make a large bow to wear above your dragon tail. These pieces were the pop of color my eyeballs were waiting for. After all that white fabric, we get to add some salmon fabric accents. I cut my tie, belt, and bow all from the same cotton material. There were multiple pieces that I had to cut various sizes of interfacing to back. The bow, belt, and necktie all have a different thickness of sewn in interfacing!
Where I would be quick to add metal snaps and or a metal buckle, I had to remember my goal and used a couple strips of white Velcro. The belt has Velcro at the back. The attachment is then hidden by my bow that Velcro’s to the back of the belt before wrapping around the belt and then velcroing to itself. This creates a sturdy and light weight hold. No frumpy bows on this maid.


Waist Bow UPGRADES
You Can Watch my LARGE Bow (TWITCH) Live Stream: (2-13-2023) HERE
This first time I made my waist sash and back bow I used an iron in interfacing. It was time to look back at my references and make things match her anime silhouette. I was never really happy with the lack of ‘poof’ in her bow. For a previous cosplay I used a sewn in foam for definition in a body suit. There was still scraps laying around the workshop and I was able to cut enough for my my upgrade(s).
FIRST, I re-drew out the bow pattern pieces and cut out the interfacing layers. Using Heat ‘n Bond, I pressed Stiff Interfacing and foam interfacing together = Super stiff and poofy interfacing was born! This gave me a firm backing and pillowy top. I went about sewing my Salmon colored cotton fabric the same as before. Due to the bow being thicker than the first one, I had to hand sew the top and bottom perimeter closed. The bow is FULLY lined as well. I hate wasting fabric and supplies, etc. When I folded up my NEW SUPER BOW, it still looked like it was missing something, or rather I was forgetting something. This was not a feature in my reference. However, once I set the old bow behind the new, I could not go back. I LOVED IT!
The way the bow attached to my belt was the proper, light-weight, engineering for this project. I made more Velcro attachments that would wrap around the new belt and Velcro into itself.


As you can tell by the silhouette; big improvement.
The thought of having to tie and iron this tie over and over again seemed daunting. I was quick to order some adjustable neck tie hardware to make life easier.
Huge thank you to Cambridge School for showing me how to use my ‘pre existing’ tie with just a couple more wrap arounds!
How to (Re)Tie a Pre-Tied Children’s Neck Tie


Neck Tie UPGRADES
After having to iron my tie after just one ‘tie-job’, I knew I was going to have to modify my original maid neck-tie. It would be easiest to have it be removable, so I used bow-tie hardware, as this provided a light weight and adjustable solution. The same interface that I ironed to the tie’s body, I ironed to the neck-tie ‘strap’. This would also assist with keeping my dress shirt collar crips. The original neck-tie was used and wrapped/tied around the neck strap in a Windsor-Knot style. The upgrades created a slightly larger neck-knot. This small adjustment assisted with meeting the anime style proportions.


HORNS + HEADBAND
With some scalloped edges here, and some scalloped edges there - Oh Mc’ Dis lost her mind - Ee i ee i ‘RAWR’
The headband was pretty straight forward. I used the stitch in the ditch technique to hit my stitch on the top of the headband. Again there are no raw edges and everything has be pressed for that “Best Maid” look.
(psst, have I shared with you all how much I DISPISE ironing?? - cause I DO!)


Along side our blue and white headband, Tohru has a set of dragon horns. These horns would need to be super light weight, easy to wear, and sturdy enough to travel with.
30mm EVA foam rollers were measured, cut, and heated before being shaped in the Tohru’s horn shape(s). The two pieces were attached using Barge contact cement. After the glue had fully dried, I used Lumins Workshop EVA foam clay to fill in my gaps and smooth out the transition between both surfaces.
I created brackets out of Worbla (thermoplastic). These brackets made it easy to slide up the side of the headband from the opposite side of the wig. Just like the first headband with scalloped trim; this headband also ties at the nape of my neck and underneath my wig!
Flexbond was used to seal the foam for paint, with acrylic paint for application, and poly urethane as a sealer.


GLOVES + SOCKS
Yes - white gloves. A color that is extremely easy to keep clean. I couldn’t possibly get them dirty - what could go wrong.
I am a very messy individual - I have never considered owning a pair of clean-white gloves. Using a two-way stretch fabric and a stretch stitch … MAGIC! … or 4 hours of work later!
Note: This is the only scalloped edge area on the outfit that were not pleated in their ref images.
Tohru has two different types of socks (white or black). Due to there being no other depictions of black in this outfit - White was the selected sock color. I did not want to create a ‘FULL’ sock for this cosplay. With all the layers of fabric already donning my body, I wanted to make socks that resembled the ‘stirrup-leggings’ I used to wear in second grade, however, cut the leggings off just above the ankle. This would be able to keep my feet breezy as well as make it look like this maid is wearing proper socks!


NOPE - Let’s Try That Again
I was never fully satisfied with the fabric choice I initially select for my socks and gloves. The 2-way stretch was always too shiny and stood out against the other fabric textures. I selected a 2-way stretch Jersey knit that was softer and had close to a matte finish. The new fabric also assisted in retaining the scalloped edge’s edge.
Using a pinking scissor to finish up the fabric around my finger edges, I did take the gloves right to the forearm seams with my serger. The goal was to reinforce any seams that might meet extra use or experience pulling. I assumed that I would be adjusting and pulling up my gloves from time to time and did not want any thread to snap in the process. They definitely look more maid like now.


Along with making adjustments to the gloves, this gave me the opportunity to match my Jersey fabric and change the color and patterns for my socks. As great as my original stirrup-sock idea was, they wiggled around too much for my liking. I only wanted one seam visible, and did not want a seam running under my feet. I knew this would provide blisters and would not be a good idea for a long day of wear. I was also able to switch up the color of my socks now. Initially, I went with the white socks from the references. With there being no black elements to account for, black socks felt out of place. Now that there were demonic chaos dragon wings, the black socks almost seemed like a needed change. A way to balance and help offset the weight of the dark colored wings.
My serger closed up my raw edges while still retaining the stretch needed to slip over your foot!
LET ME TELL YOU - I will be making my own dress socks from here on out. They fit so well and are soo soft. I mocked up a pattern using my old socks for Tohru to determine height and a pair of old dress socks to assist with fit and size.


SHOPPING TOTE
Time to create a ‘prop’. This was a challenging part. What we do see time and time again is her grocery bag/tote. You can see in the anime stills below she has a canvas tote to carry everything for dinner. A tote would also assist with holding any of my con necessities.


My local fabric store did not have a green canvas material that matched the hue I needed, so I would have to take some lime green canvas material and dye it with Rit Dye-More. It was easy enough to obtain the darker green after a 15 minute bath. After a good wash and dry (making sure the dye was not going to run or stain anything). I ironed the material and continued forward with my tote. Interfacing was piped into the handles. There are pockets inside that will make sure my keys and chap stick do not roll around at the bottom.


Sometimes, it is all about the details. One thing I dislike about all the totes are their lack of closures. A zipper would be too intrusive and out of place, so I decided on magnets and double checked that I had the correct polarities before sliding them into their cavities and them shut.
There was no 'recognizable logo’ on the bag. You can see a small pink cat-like decal towards the top of the back, between the two handles. EVERYTHING had to match. I used Tulip fabric paint with a 3 layer application. After having time to dry, I followed up with placing some fabric over my design and applying heat with an iron.

SHOES
Brown, Oxford, lace-up, kitten heel shoes. FOUND THEM! I did not cobble Tohru’s shoes, however, hours were spent hunting around for brown Oxford shoes that would fit my feet (Womens Size 5) as well as had that small heel. Being on the ‘shorter’ side of life - when it is at all possible - I choose to wear heels. Though Tohru would need a sensible heel hight to continue serving Lady Kobayashi like a good maid should.
WIG
In every cosplay there are some things that are just out of your control, and instead of getting angry or sad - just spend another 30 min on the internet shopping around. Tohru’s wig was out of stock with Arda, however, we found a Tohru wig that would fit with our price budget, had removable pigtails, and would just need some heavy handed styling!
MAKEUP
I was over joyed to see that Tohru does not require me to glue any large prosthetics to my face. Her clean and fresh skin is accomplished with prep, a pore minimizer, and foundation. I am looking for a more clean and innocent appearance. (This is a complete 180 degrees to my style… no fake blood… wahhhh)
Neutral make up and light-handed eyeliner. White cream to create highlights and anime shine marks.

COLORED-CONTACTS
I have had the pleasure of purchasing ALL my cosplay contacts from the same retailer, Uniqso. Any issues I have had; after contacting, they have made right. There was no question about ‘where’ to purchase contacts from. It was a matter of ‘which’ contacts would be right of Tohru.
Initially, I thought about getting dragon-themed contacts. However, I have tried the ‘slit-pupil’ contacts in the past and have never been able to get them to sit properly. Even being weighted, after hours of wear one of the eyes is always looking more frog than dragon.
Direct Contact Link:
https://www.uniqso.com/products/sweety-anime-red-b156?variant=39333527388183
DISFUSIONAL 10% OFF Discount Link:
https://www.uniqso.com/discount/DISFUSIONAL (Use Discount Code 'DISFUSIONAL' at checkout to receive 10% off your purchase!)
DISFUSIONAL Referral Link:
https://www.uniqso.com/?ref=8ef4o721hs (If you make an account, please use this link! Thank you kindly.)
D for DRAGON!
SCAN QR CODE —>
Tohru’s Fabrication Webpage
(For all your Image ZOOMING needs)
We thank you for your continued support. Are you interested in following along with current and future projects?
Please, check out our social media(s): Facebook, Instagram, Twitter, Youtube, Twitch
Until next time; I’m Ashlee Kalthoff of Disfusional Studios – don’t forget to ‘Creatively, unfold your imagination’. Bye!